
New Media Server Build
My new server build taught me many lessons along the way. Here is the story, and hope to help you if you decide to build your own.

First, I want to say I am sorry that I haven't posted in such a long time. Real life has been keeping me busier than I would like. Secondly, I haven't forgotten about my other post and articles, but I want to take my time to make them right, and as I just said, I haven't had much time. With that out of the way, let's talk about what I have been working on with what little free time I have had, shall we?
The Beginning
So back in May, I had the opportunity to buy new parts for a new media server. While I knew what I wanted and how I wanted to do it, I had no idea that I would still be learning along the way. Well, that's a lie. I also plan to learn, but man, did I learn some things the hard way this time.
The original idea, I knew I wanted a lot more computing power than what was in my existing media server. I also knew the case I wanted to use, allowing me to have sixteen 3.5 mechanical drives. So I worked my way backward, selecting the computer case to CPU instead of the average PC build where you would choose the CPU and work out to the case.
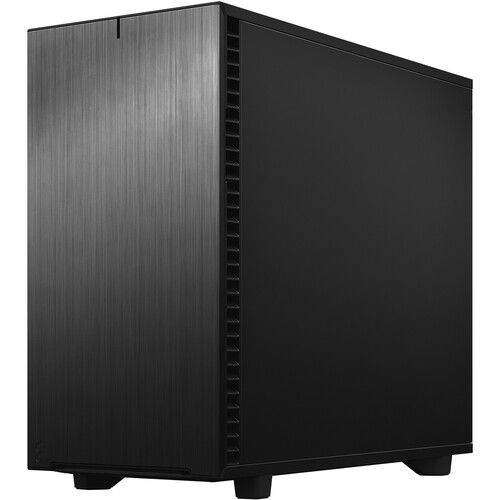
So what case did I use for this build? Well, I went with the Fractal Design Define 7 XL. This case lived up to the hype from YouTubers, Reddit, etc., and boy, is it massive. This case was also not cheap at the time I bought it. The case was $224.99 on NewEgg and did not come with all the hard drive trays I needed. These trays cost an additional $18.99 for a pack of 2, and I need 5 of these packs.
With the case sorted out, I determined the CPU I wanted to use. I knew I wanted to be extremely beefy and able to handle almost anything I threw at it. So I decided to go with a pair of Intel Xeon E5-2630 v3. Yes, I know there are a lot of better CPUs on the market that are probably better. I was on somewhat of a budget and had already spent a lot on the case. I also picked up a pair of Noctua NH-D9DX CPU coolers to keep the CPUs nice and cool.
Now here is where the learning started. I originally bought an X99 Dual CPU motherboard from NewEgg to pair with the CPUs for several reasons; one, it supported two NVMe drives. Second, it had two PCI-E x16 ports which I knew I need one for the LSI card and possible expansion in the future. Third, it supported 256 GB of memory. We will get into this more in the next section.
Next, I chose the memory that worked with this board. I went with four Samsung 32GB ECC Load Reduced DDR4 2133 Server Memory sticks.
I used the CORSAIR RM750e Fully Modular Low-Noise ATX Power Supply to power this beast.
For the NVMe, I originally planned to go with 2 Western Digital WD Red SA500 M.2 500 GB drives. This was another learning curve that we will discuss further later on.
To be able to support the sixteen mechanical drives I planned to use, I picked up an LSI 9201-16i 6Gbps 16-lane SAS HBA. I also picked up four Cable Matters Internal Mini SAS to SATA cables that were 3.3 Feet or 1 meter long from Amazon.
The Build
Boy, oh boy, was this a build I will never forget but will hopefully turn into one that will last just as long, if not longer, than the current media server that this is replacing. As parts arrived, I started the build process and figured out the struggle this build would be.
The first problem I ran into and will address in the future is with the power supply. I thought the power supply had enough cables to support all the drives when I ordered it, but after opening it up and looking at it. I quickly realized that I needed to order more. I could not find the cables to connect the hard drives to the power supply directly, so I ordered five Monoprice Data 4-pin Molex male to 15-pin SATA. So, for now, I am using a Molex power cable to the power supply and then using the power cable from Monoprice to power up most of the drives.
Next was waiting on the Motherboard to arrive from China, which I didn't know that is where it was coming from. While waiting on the motherboard, all the other parts showed up, including the memory, CPUs, NVMe, and coolers arrived. I installed everything like I have down over a dozen times and started running into issues with this motherboard. First, it did not come with an owner's manual, and I could not find one online. Second, this motherboard had no onboard video, so I snagged a Quadro P2000 off Reddit. Third, once I could power it on for the first time, it gave me an error code of B7 or maybe 67, but it was hard to tell without a manual. After spending several hours troubleshooting the memory and the CPUs, I threw in the town and bought a used SuperMicro X10DRH-IT.
This led to the next issue of now I had NVMe drives with no way to use them, so I started googling and discovered others had used a Supermicro AOC-SLG3-2M2. So I ordered two of these and a Western Digital Red SN700 2TB NVMe SSD directly from Western Digital. I thought I could use the 500 GB drives for os and misc stuff and the 2TB drive for storing bigger files. I found this card cheaper on Amazon than anywhere else, so I ordered two.
After receiving the new motherboard and the Super Micro cards in the mail, I returned to building the server, leading to even more issues. The first issue was one of the sticks of memory was bad, so I ordered another one from Amazon. While this wasn't a big issue, the next few were. The second issue was that the SA700 drives were not recognized. They were type B.2 NVMe drives, and the Super Micro cards only supported M.2, which was not a big issue. I ordered a 250GB and a 500GB, and another 2 TB WD Red SN700 NVMe while I was at it. Once I received all of the NVMe drives, at this point, you would think I was cooking with Crisco, right? Nope, this led to the biggest learning curve of the entire build.
For me to be able to boot from the NVMe drives, I spent several hours researching and ended up coming to the conclusion that I needed to roll my own bios. Thanks to a forum thread at ServeTheHome, I could roll my own and boot from the Super Micro cards with an NVMe for the OS. This was literally the most scared I have ever been when updating bios because if it didn't work and bricked the board, this build would be on hold even longer. Luckily I wouldn't be writing this if it was wrong. So after the bios update, I installed Ubuntu 22.04 and faced one more issue. Once I rebooted the server after doing updates, I no longer had any network connectivity. I discovered in the bios that I still had the network cards set to legacy mode and that Ubuntu was running in UEFI. I changed that and went ahead an reinstalled the Ubuntu. I have rebooted several times now, and the system is ALIVE.
Conclusion
At this time, I am still working on getting applications and stuff setup, but I believe all the challenges are behind me. While this build did not go according to plan and took more money and time than it should have, I am glad I did and look forward to the many years of use it will give me. I already had some of the parts for this server, like four 16TB Western Digital Red Pro NAS Hard Drives, eight 10TB WD Red Pro and Plus Hard Drives, and 4 8TB Seagate IronWolf hard drives. I have 144TB raw with 32TB RAW for parity with this server. This is not taking into account the NVMe drives. Below is a full breakdown of the parts that are installed and the price for the installed parts. Please comment below if you want to know more about the OS and Software I use in this system.
| Part | Price Per Item | Amount | Vendor | Link |
| Fractal Design Define 7 XL | $224.99 | 1 | NewEgg | Here |
| Fractal Design Hard Drive Trays | $18.99 | 5 | NewEgg | Here |
| Intel Xeon E5-2630 v3 | $29.00 | 2 | NewEgg | Here |
| Noctua NH-D9DX i4 3u | $59.95 | 2 | NewEgg | Here |
| Samsung 32GB ECC LRDDR4 | $39.07 | 4 | NewEgg | Here |
| CORSAIR RM750e Power Supply | $99.99 | 1 | NewEgg | Here |
| LSI 9201-16i HBA | $202.84 | 1 | NewEgg | Here |
| Cable Matters Mini SAS to SATA Cable | $12.99 | 4 | Amazon | Here |
| Supermicro X10DRH-iT | $179.95 | 1 | Amazon | Here |
| Supermicro AOC-SLG3-2M2 | $59.84 | 2 | Amazon | Here |
| 250GB WD Red SN700 NVMe | $51.99 | 1 | Western Digital | Here |
| 500 GB WD Red SN700 NVMe | $66.99 | 1 | Western Digital | Here |
| 2TB WD Red SN700 NVMe | $249.99 | 2 | Western Digital | Here |
| Quadro P2000 | $150.00 | 1 | ||
| 16TB WD Red Pro | Already Owned | 4 | Already Owned | |
| 10TB WD Red Pro/Plus | Already Owned | 8 | Already Owned | |
| 8TB Seagate IronWold | Already Owned | 4 | Already Owned |